This demonstration showcases the new Gridview/Survey and Rating field types now available in Dynamic Forms. We will also demonstrate the ability to present form results in PDF.
Let's start with the Gridview/Survey field type.
This new field types offer 2 user selection options: the checkbox and the radio button as seen on Question 1 and Question 2, respectively. We recommend using the radio button if the user can only make one selection. If the user can make multiple selections, use the checkbox option.
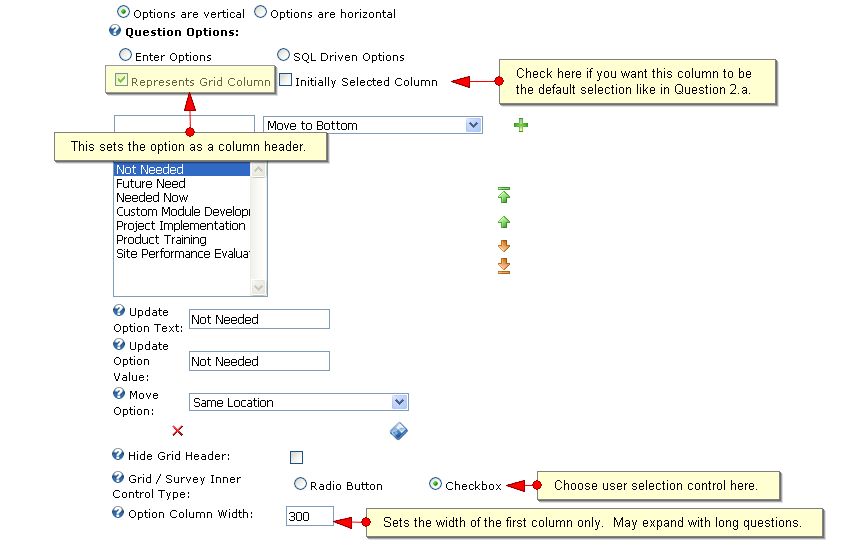
Let's take an admin look at Question 3:

To achieve the gridview layout on this demo, we selected the settings "Hide Field Label" and "Display label and field in same column" found in Advanced Field Options. We also chose to use Text/HTML fields to present the questions but this is not necessary as the field label is displayed as the header for the first column.
If you wish to change font and colors on your gridview field, go to Module Configuration, Style Sheet. Within the custom Dynamic Forms Style Sheet, you'll find a section like this where you can make changes:
.DynamicForms_GridColumn{ background-color: #000000; }
.DynamicForms_GridHeaderColumn{ background-color: #ffffff; color: #08088A;}
.DynamicForms_GridItem{ background-color: #CEF6CE; }
.DynamicForms_GridColumn{ background-color: #9BDA80; color: #000000;}
.DynamicForms_GridView{ background-color: #5C97EF; color: #000000; font-weight: Bold; }
Don't forget to hit "Update Style Sheet" before hitting "Update Settings" at the bottom of the page.
Now let's review the Rating field type.
As you saw in the demo above, you can now use a Ratings field type in your Dynamic Forms. The image below taken from the question to rate the Gridview field shows the various settings available for this field type.

You'll notice that the default rating is set to 5 stars. In comparison, for the next question to rate the Rating field, the current setting is zero and the Max Rating is set to only 5.
Similar to the Gridview field, you can change the appearance of the Rating field by going to Module Configuration, Style Sheet. Apply your changes to this section:
.DynamicForms_WaitingStarCSS{
background-image: url(/DesktopModules/Dynamic Forms/Images/GreenStar.jpg);
.DynamicForms_EmptyStarCSS{
background-image: url(/DesktopModules/Dynamic Forms/Images/GrayStar.jpg);
.DynamicForms_FilledStarCSS{
background-image: url(/desktopmodules/dynamic Forms/Images/BlueStar.jpg);
/* Rating */
.DynamicForms_StarCSS{
font-size: 0pt;
width: 15px;
height: 25px;
margin: 0px;
padding: 0px;
cursor: pointer;
display: block;
background-repeat: no-repeat;
Again, remember to hit "Update Style Sheet" before hitting "Update Settings" at the bottom of the page.
Creating PDFs
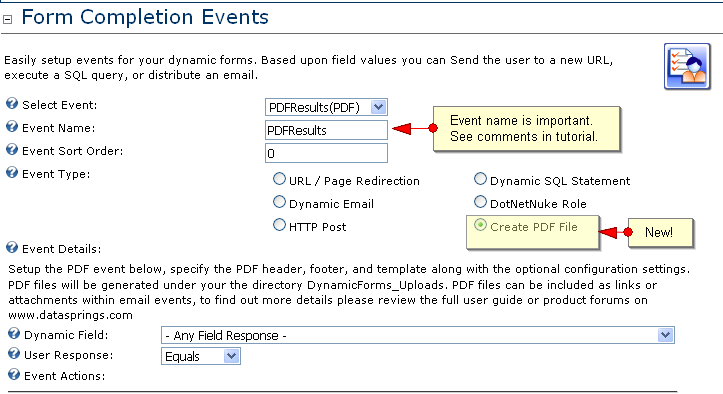
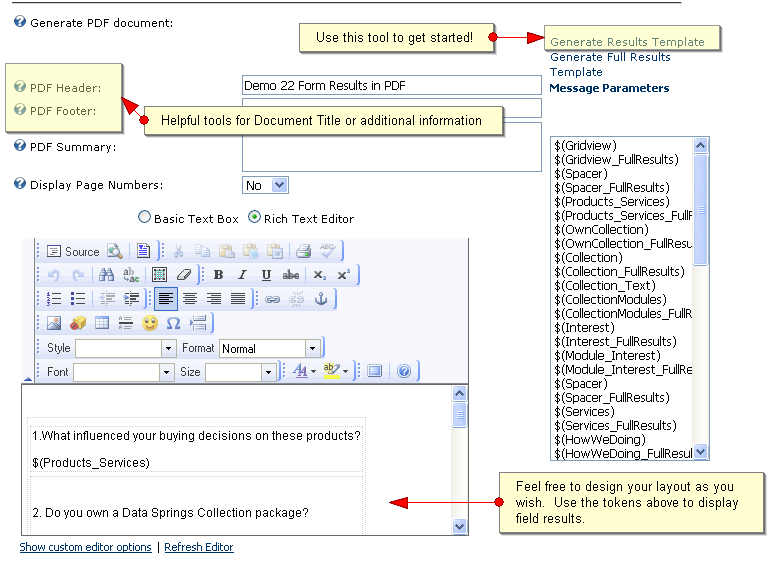
Creating PDFs is a new option offered as a completion event. Let's take a closer look at the PDF event in this demonstration:


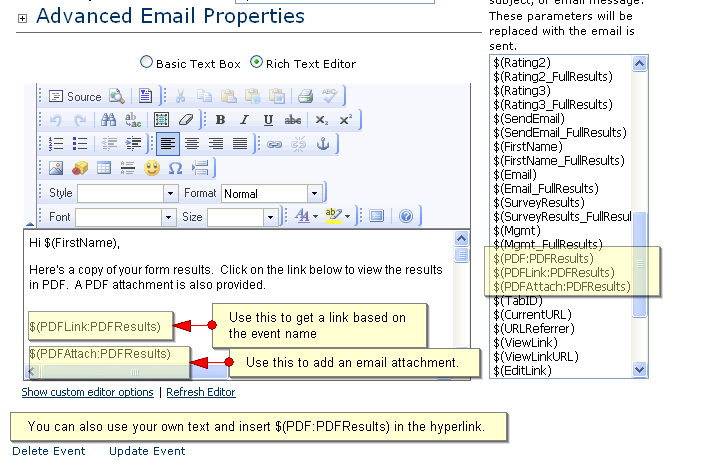
Once your PDF event is set, you can use this in your email event. If you provided your email address, you would have received the 'Dynamic Forms Demo # 22 email. Here we offer a link to the PDF. A PDF attachment is also included in the email. How your users receive the PDF is determined by these tokens:
You'll notice that the tokens are based on the PDF event name. These will only show if a PDF event was created prior to creating an email event.

|
Helpful hint:
When using the PDF tokens in an email event, make sure that the PDF event has a lower sort order than the email event. This will ensure that the PDF gets generated first before the email is sent out.

|
Other tricks used in this demo
Did you like the character count for the comments field? We used this client side event in the comments field (under Advanced Field Options): countChars('divMessage',$(MyComonkeypressonkeyup),500)
Want a similar look for your Gridview fields in your email event? Here's how you do it:
1. Go to Module Configuration, Style Sheet and find the section for Gridview (GridColumn, GridHeaderColumn, GridItem, etc.). Copy that whole section and paste it to Notepad where you can make changes if you wish to..
2. Go to your Email Completion Event and switch from Rich Text Editor to Basic Text Box and plug in the copied or modified Gridview stylesheet section at the very top. Here's an example:
Visit other Dynamic Forms Demonstrations to see how this module can enhance the look and functionality of your site!